Securing Web APIs with Azure AD: Authorizing Client Applications
Posts in this series:
- A Case Study
- Designing Authentication Schemes
- Authorizing Client Applications
- Building the Server
- Enabling Local Development
- Connecting External Clients
- Connecting Azure Clients
In our last post, we chose the OAuth 2.0 Client Credentials grant scheme to authenticate our APIs and daemon applications:

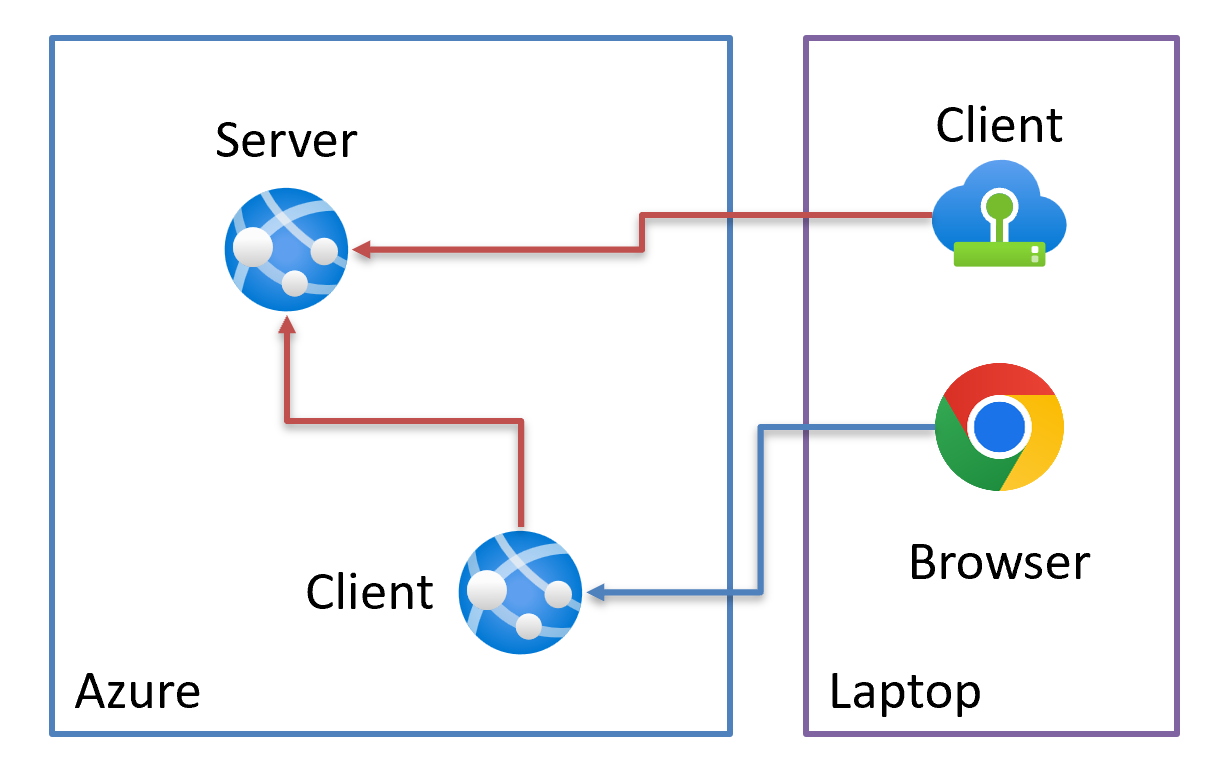
Once we go the route of performing "service account"-based authentication, our authorization strategies now change as well. We no longer have a token representing an end user (in the picture above, the browser calling the client), so we'll have to pick something else to base authorization from besides whatever we might find in the original token (or cookie or whatever).
You might be wondering why we need authorization at all - after all, we're behind the firewall, right? Not quite, because this goes against Zero Trust and Least Privilege principles - we should only allow the client applications that we explicitly grant permissions to, not just anyone be able to access anything. This way we limit the surface area of potential attacks and exploits.
In my real-world use case, we were dealing with health data and only wanted the client applications that could properly protect that data based on complex rules and agreements. Those rules and agreements were channel-specific, which is why we opted for BFF-based patterns for our external client APIs.
From the documentation, we have two main options for direct authorization:
- Access control lists (ACLs)
- Application permission assignment in Azure AD
The first option, ACL, leaves authorization for specific client applications up to the server itself. The server would check the appid and iss claims in the bearer JWT, and make sure that:
- The issuer is what is expected
- The client's application ID is allowed based on whatever operation is being requested
The ACL option then becomes "whatever custom logic you want to perform". We could look at the application ID, the specific operation/API endpoint, the data being requested, just about anything.
The other option, application permissions, is wholly defined and managed inside Azure AD. With application permissions, Client A authenticates for a specific scope, Server B, requesting the default scope. The .default scope will grant the client a token that contains all permissions that Client A has been granted for Server B. That way we don't have to get separate tokens for separate permissions, they all come over all at once.
The specific scope we'll be asking for is constrained to the server, so our request becomes "Client A is requesting a token for Server B that contains all permissions Client A has been granted for Server B". This gives us that "least privilege" result, our client has to be explicitly granted the permissions for the server resource and are implicitly denied any permissions not granted. Those permissions are then returned in a roles claim in the issued token.
When should we pick ACLs versus application permissions? Well, it depends (of course). We wound up picking application permissions mainly because we didn't want to deal with an ACL inside our application. Where would it be stored? How would we update it? Could it be updated with our infrastructure-as-code strategy? With Azure AD, we had all of those questions answered.
Designing the Permissions
OK so we've settled on using the Application Permission strategy, we now need to decide what our application permissions should be. This is where things get a little confusing - in many parts of the documentation and resources, application permissions are also referred to as "app roles". But for our purposes, we'll treat these app roles as permissions, representing a grant for an application to be able to perform some action.
Our sample app I chose to build is a "Todo" API, mainly because it has basic CRUD operations. This API exposes the following endpoints:
- GET /api/todoitems - retrieves all Todo items
- GET /api/todoitems/{id} - retrieves a single Todo item
- PUT /api/todoitems/{id} - updates a single Todo item
- POST /api/todoitems - creates a single Todo item
- DELETE /api/todoitems/{id} - deletes a single Todo item
Yes this API has the cardinal sin of "conflating HTTP methods with SQL DML" but I was too lazy to think of anything more interesting.
In the Microsoft Graph APIs, you'll see permissions like:
- Calendars.Read
- Mail.Send
Where the name of the permissions is basically "Resource.Action". The application permissions are defined on my application itself so we don't need a super descriptive name, we can define the resource just in the context of our application. For this API, "Todo" or "TodoItem" will work for the Resource.
For the Action, our API is very CRUD-oriented, so we can make it as granular as:
- Todo.Read
- Todo.Create
- Todo.Update
- Todo.Delete
This might be too granular, so maybe we can just simplify to:
- Todo.Read
- Todo.Write
All of the GET operations will authorize the Todo.Read application permission, while PUT/POST/DELETE will use the Todo.Write application permission.
For our contrived example, let's suppose that the Client API inside of Azure can read and write todo items, but the daemon application can only read. We'll assign these application permissions accordingly.
Now that we've designed our authentication and authorization strategies, we can get around to actually implementing something! In the next post, I'll look at building out our Azure resources and securing our server Web API.
